Micro-Forests
Micro-forests are essential for environmental restoration. They are dense and grow in short period of time. Micro-forests rely on indigenous plants and help restore entire ecosystem : plants and animal species, soil, air, water, temperature.
A unique technique to grow forests in much smaller timescales was developed by and named after Japanese botanist Akira Miyawaki, that helps build dense, native forests. The approach is supposed to ensure that plant growth is 10 times faster and the resulting plantation is 30 times denser than usual. It involves planting dozens of native species in the same area and becomes maintenance-free after the first three years.
This article shares the basic steps to create such forests in small urban spaces, as small as 30 square feet.
Step 1: Determine the soil texture and quantify biomass.
Soil texture helps determine water holding capacity, water infiltration, root perforation capacity, nutrient retention, and erodibility. Check if the texture is sandy, loamy, or clayey.
What to add to the soil?
- Perforator materials help to improve perforation and allow roots to grow quickly. For this, we can use biomass that is spongy and dry in nature. Husk is a by-product and easily available at grain mills and animal feed stores. Other options include Rice husk, wheat husk, corn husk (chipped) or groundnut shells (chipped).
- Water retainer helps soil retain more moisture and water, as compared to its natural water retention capacity. Natural materials such as coco-peat or dry sugarcane stalk can be used. A good test is to dip the material into water for some time and take it out and squeeze. If water oozes out during squeezing, then the material can be used as water retainer.
- Organic fertilisers are required for nourishment. Different materials can be used depending on region and availability, such as cow manure, goat manure or vermicompost. Compared to vermicompost, manure is a slow nutrient-releasing plant fertiliser. Manure provides small amounts of nutrients over an extended period, whereas vermicompost gives high doses of nutrition initially but very little later on.
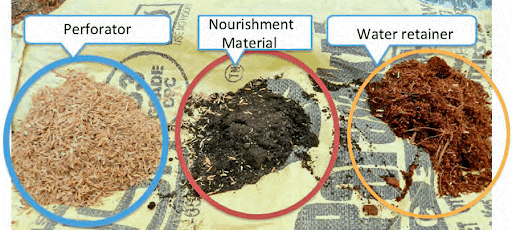
Select the appropriate perforator, fertiliser, and water retainer.
- Mulch insulates and protects the soil. It prevents sunlight from falling directly on the soil. Direct sunlight will make soil dry and make conditions difficult for the young saplings. This is especially important in the first 6-8 months, as the plants are young. Mulch also plays a huge role in preventing water from evaporating. Options include rice straw, wheat straw, corn stalk or barley stalk.
Step 2: Select tree species for plantation.
We should try to plant as many species as possible for biodiversity.
- Make a database of all native species of your area. Identify its type (Evergreen, Deciduous or Perennial), advantages, maximum height and assign layer.
- Check the native species saplings availability in the nursery, their age and sapling height. Ideal height is 60 to 80 centimeters.
- Major species: Choose five different species to be the major forest species; these should be the species that you commonly find in your area. This will constitute 40-50 percent of number of trees in the forest.
- Supporting species – other common species of the area will constitute 25-40 percent, and minor native species will make up the rest.

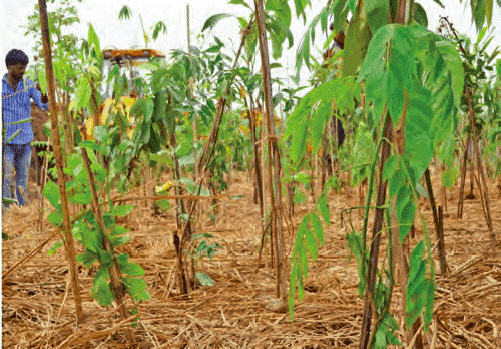
Select as many species as possible, for biodiversity. Credit: Afforestt
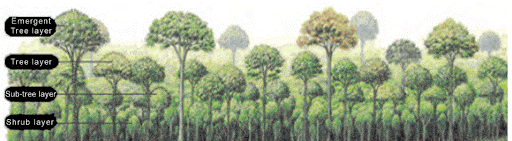
Select plants that grow up to different levels. Credit: Afforestt
Step 3: Design the forest
- Master Plan: Identify the exact area for afforestation so as to procure materials and execute the project. The minimum width of the project area should be 3 metres, but 4 metres is recommended.
- Watering Plan: The water pipeline layout may need to be designed by an architect, based on the daily water requirement for the area, backed by borewells and overhead tanks. The forest should be watered regularly for the first 2-3 years.
- Planning Project Execution: We also need to identify spaces such as the material/sapling/equipment storage areas, site office and resting area for labourers. There should also be approach roads to the afforestation area for earthmover access, and to the materials/saplings storage areas for truck access, if the project area is large.
Step 4: Preparing the area
- Site inspection: Visit the site to determine the feasibility and scope of the project. Take pictures of the site, and confirm the availability of fencing, maintenance staff, running water and sunlight. The site should get sunlight for a minimum of 8-9 hours a day. No pipes/drains/wires or debris should be present in the area.
- Removing debris and weeds: Weeds take away nutrition of the soil and restrict movement of materials and people. Hence, they should be cleaned either manually, or using a JCB/John Deere Tractor if the area is huge. Ensure that the pulled-out weeds are disposed away from the site; else they may re-grow.
- Watering facility installation: There should be a main line with watering outlets for hoses, which can reach the entire area of the forest. Watering should be done every day manually using a hosepipe with a shower, and not by drip irrigation, sprinklers etc. The requirement is around 5 litres/sq metre per day.
- Physical demarcation of areas: The areas should be marked (with limestone powder or wooden peg/rope) before earthwork starts. Ensure that the marking of areas matches 100 percent with the master plan.
- Making approach roads to marked areas: Clear weed growth, big stones, and boulders. The path could be of any material (soil, sand, gravel, tar etc.), but trucks/tractors should be able to use it.
- Mound identification: The forests are usually created on 100 sq metre mounds, and each of these need a serial number in the order in which they will be created. Only after one mound is created and plantation completed on it, can the next mound be created.
Step 5: Plant the trees.
- Mixing materials: Perforator, water retainer and fertiliser, all without clumps, should be mixed together. They should be mixed in the exact ratio as was decided initially, for each mound.
- Preparing the ground for plantation: Each forest is created on a 100 sqm mound. Using an earthmover machine, first dig the earth to a depth of 1 metre on the 100 sqm land. Put half the earth back into the pit and spread it uniformly. This is to make the soil loose. Mix with the soil half the biomass prepared in the previous step. Then put the remaining soil back into the pit and spread it uniformly. Now mix the remaining biomass with this soil evenly. Afterwards, shape the soil into a mound. In the Miyawaki method, all saplings will be planted together on a mound, unlike conventional plantations where individual pits are dug up for each sapling.
- Selecting trees for plantation: Place plants on the mound to create a multi-layered, natural forest. Try to group plants that grow into different layers – shrub, sub tree, tree and canopy – in each sqm. Try not to place two trees of the same kind next to each other; also, don’t follow a pattern while planting the trees. Try to maintain a distance of 60 cm between saplings. The goal is to have random, dense plantation of native tree species.
- Plantation: To plant the tree, dig a small pit on the mound with a trowel, remove the root bag in which the plant was growing, and gently place the plant in the pit. Level the soil outside gently around the stem of the plant, but do not press or compact the soil. There should not be more than 8-10 people on a mound at a time, since the idea is to plant on loose, aerated soil.
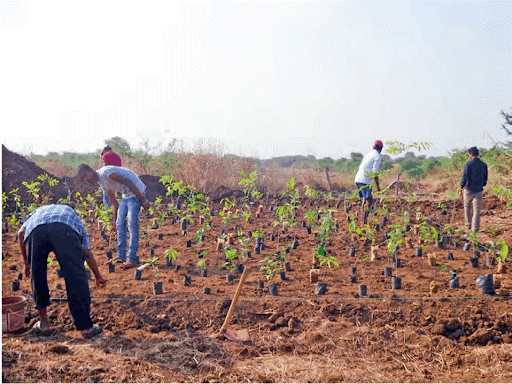
Plantation on a mound. Pic: Afforestt
- Support the plants with sticks: Saplings need support during the initial months so that they don’t droop or bend. Insert support sticks into the soil close to the plant, without damaging the roots of the plant. For plants shorter than 1 metre, use 1 metre-long bamboo sticks. For taller plants, use slightly thicker 2-2.5 metre-long bamboo sticks. Tie the sticks to the plant stems using thin jute strings. Support sticks will be needed for at least every alternate plant.
- Mulching: Mulch should be evenly laid out on the soil, in a 5-7 inch layer. To ensure that the mulch stays on the ground and does not fly around, it should be tied down with jute ropes. For this, bamboo pegs should be nailed at the periphery of the forest. Tie the pegs to each other with rope, pressing down on the mulch. There should be 30 pegs,each around 2 ft long, around every 100 sqm mound. Use jute ropes to tie mulch to the ground. Pic: Afforestt
- First watering: The first time, the forest should be watered for an hour. Minimum water requirement is 5 litres per sqm, or 500 litres per 100 sqm mound.
Step 6: Look after the forest for three years
Monitoring:The forest should be monitored once in 1-2 months, to check if the targets have been achieved and if any changes should be made to improve results. This should be done the first 8-12 months. Count the number of saplings that have survived, and record the data. Growth of selected species should also be monitored.
Maintenance
- o Water the forest with hose pipe once a day.
- o Keep the forest weed-free for the first 2-3 years. Once the forest starts growing, weed growth will stop.
- o Ensure that the plants stay straight, are not buried under the mulch, and are only loosely tied to the support stick.
- o Keep the forest clean, and free of plastic, paper etc.
- o Maintain proper drainage system so that water does not get accumulated anywhere in the forest. Do not build bunds in the forest, as accumulated water can kill plant roots.
- o Mortality rate of plants is usually 2-5 percent. Mortality is to be checked only after 3-4 months of planting.
- o Do not use any chemicals like pesticides or inorganic fertilisers. If you notice pests, leave them undisturbed. The forest will slowly build its own mechanism to keep itself healthy.
- o Mulching should be maintained for at least one year. The soil should be re-mulched with time, since dry soil is detrimental to forest health. Also, never remove organic matter like fallen leaves from the forest floor, as it will kill good soil microbes.
- o As the tree grows taller, longer support sticks may be needed so that the tree shoot does not bend and become weak.
- o Never cut or prune the forest as it could make the forest weaker.
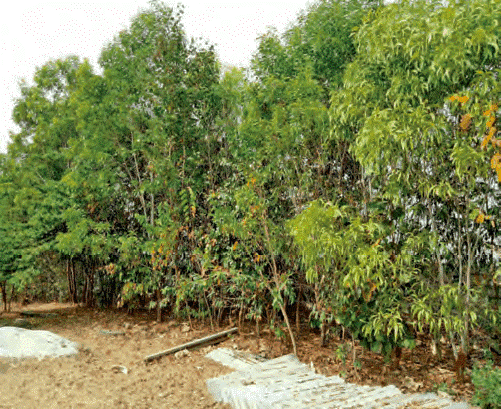
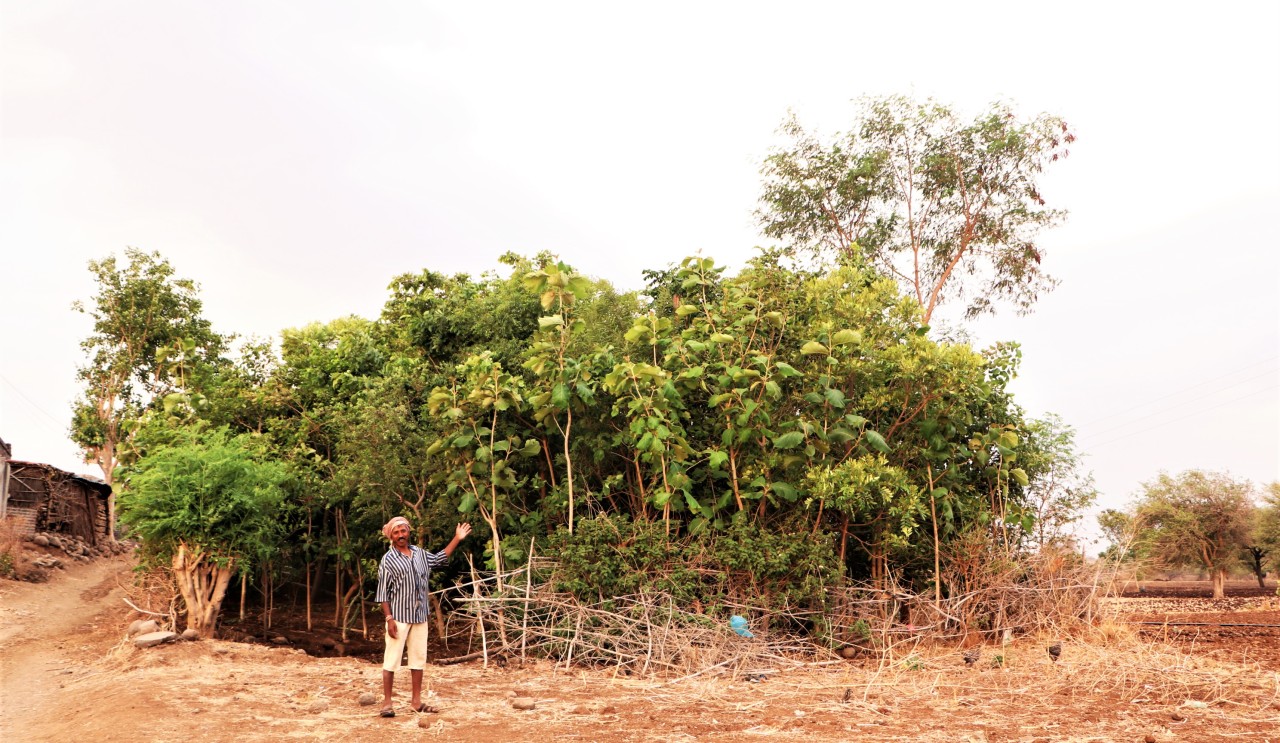
A full-grown Miyawaki forest.